I absolutely love my 280 TRS and, so it seems, do many others. Not just at every trial in this area but also at our practice venue they seem to be the bike to have. Great to see but i have never been the one to have something that everyone else has got, but i wouldn’t change bikes just to be different as i like the TRS’ too much ..
So here is my solution, make it look completely different to all the others!
I had got away with it for 6 months by fitting the RR graphics onto my standard bare alloy frame but now several others have cropped up the same.
The solution was to come up with my own design and have them made .. step forward some old friends at Amped ( http://www.thisisamped.com ) down in Cornwall. They have a kit that they sell for the TRS machines and for a small extra fee they will modify the colours to your own requirements, although they have moved away from full custom kits as it takes so much time that the resulting kit would cost a fortune.

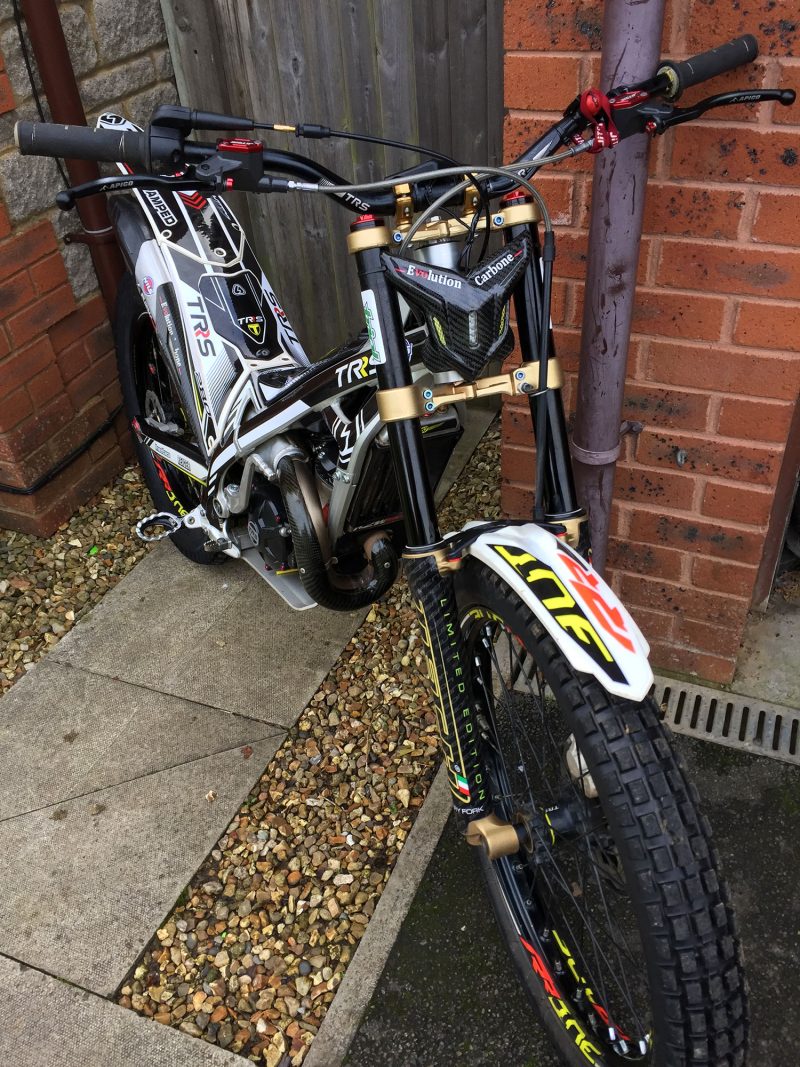
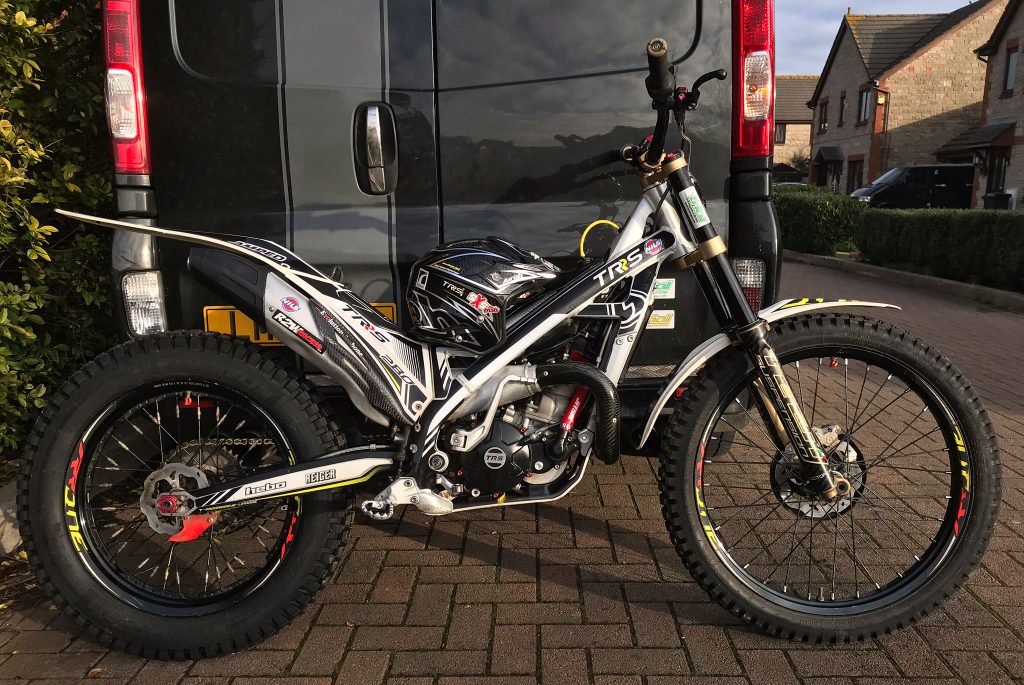
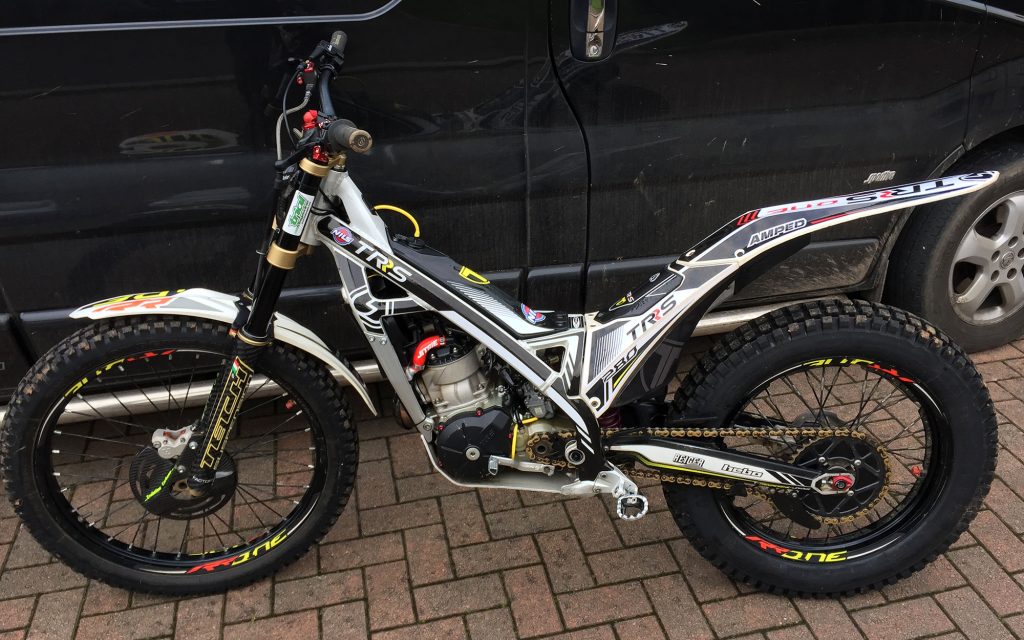
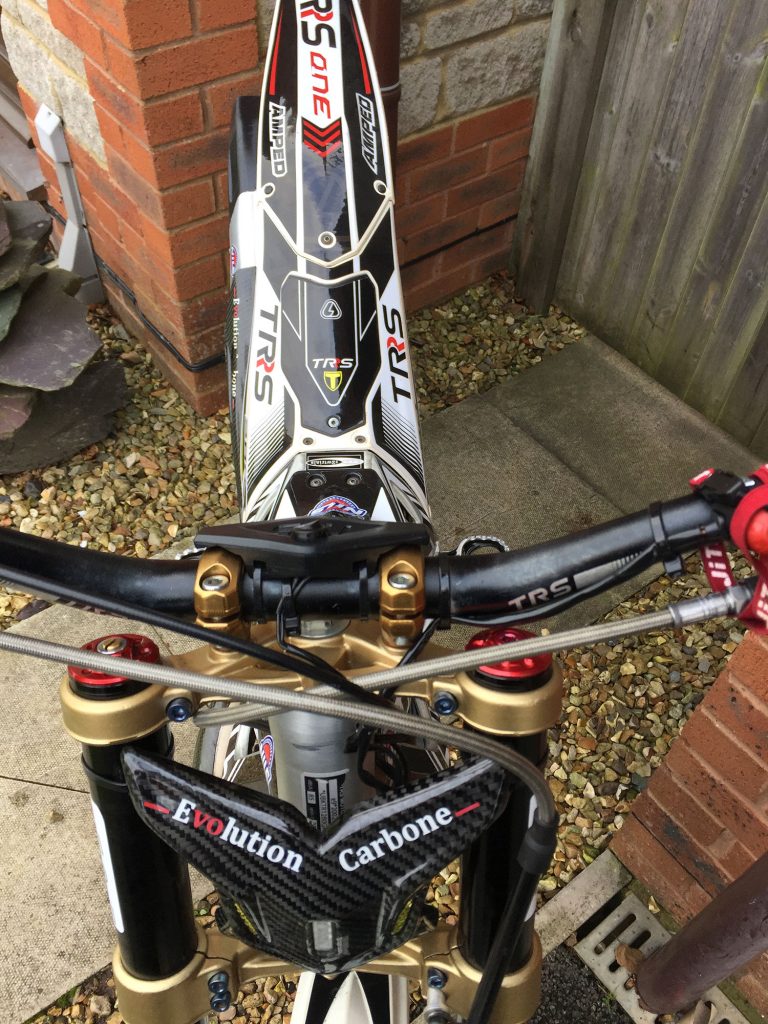
I had been playing with Photoshop on the new 2019 RR and had created a black and white version just for fun, but it just really appealed to me. But i did want a little colour still, obviously there had to be some yellow in there and also a touch of red. I sent Amped a changed version of their standard TRS kit and then asked for one little change that I had forgotten to do before sending, and this kit you see on the bike is what they sent back … asking if that was ok. OK, it’s fecking lovely !! Press the print button i said 🙂
I put the heater on in the garage, to be fair we have had a very mild winter so far, and allowed it to warm up a bit. Nothing worse than dealing with cold metal and cold graphics! Removing the old graphics and cleaning up all the adhesive residue takes longer than actually fitting the new ones, but if you are thinking of doing the same make sure you take as much time as needed. I use a heat gun set on low to warm up the old graphics, it makes it a bit easier to remove them and seems to leave a little less sticky mess behind. But you will still need either adhesive cleaner or neat petrol to do a proper job. But make sure the room is well vented for either. Contact cleaner is great for the final clean of the area to make sure no oil residue or anything remains on the bare plastic or metal. Talking of plastics, test a bit of your plastics first to see what happens just in case they react with any of the cleaning agents used!!
I’m not going to go into the methods for fitting the graphics as we all have our own ways, but i do use a heat gun to warm up the areas a bit first. Keep it low heat though! Some do take all the bits off the bike before fitting but be aware as some kits have lines and designs that flow into other areas, if you fit them whilst off the bike you may well find these don’t line up when you come to put it all back together again!
I love the final outcome. Coupled with the gold anodised fork yokes and black mudguard stay that i had done a few months back, thanks to Ross Danby for organising that, and the red anodised bits already fitted and of course not forgetting the carbon fibre bits scattered around it looks exactly as i wanted. I still love the standard designs that the 2019 bikes are now coming with, but mine now looks a bit different. Mine is over 2 years old now but i think these new colours give it a new lease of life … until someone else does the same 🙂